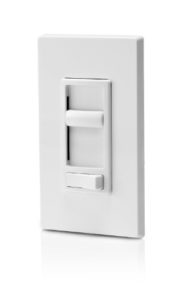
 Installing a dimmer switch for your recessed lighting is one of the simplest ways to dramatically increase the flexibility of your lighting. It’s also a fairly simple DIY project that almost anyone can do.
This post will show you how to install a typical dimmer switch for recessed lighting.
Here’s what you’ll need:
- New dimmer switch and cover plate.
- Medium screwdrivers – Flat and Phillips
- Wire cutters/strippers
- Live wire tester (Non-contact type recommended)
When purchasing your new dimmer switch, you’ll need to know whether the lighting circuit is a single-pole (lights controlled from one location) or a three-way (lights controlled from two locations). Some dimmers are universal and will work for both single-pole and three-way circuits, but read the packaging to be sure.
Once you have your new dimmer and tools, this project should take 20-minutes or less depending on your level of experience.
I’ve listed the steps below, and included a video by the Home Depot that walks you through the process. I recommend watching the video first so that you are familiar with the overall process, and then refer to the steps listed below it as needed.
Here’s a summary of the steps to install a dimmer:
Step 1. Turn off the power.
Step 2. Remove the old switch and use your live wire tester to be sure the power is off.
Step 3. Remove the wires connected to the switch. If it’s a 3-way switch, label the wire that is connected to the “common” screw (usually a black screw) before removing the wire.
Step 4. Strip the insulation on all the wires about 3/4 of an inch.
Step 5. Connect the ground wires.
Step 6. Connect the remaining wires. If it’s a single pole circuit, the order of the wires usually doesn’t matter. If it’s a 3-way circuit, connect the wire that you labeled “common” to the common wire on the dimmer. It is usually the black wire. Then connect the remaining two wires, the order doesn’t matter.
Step 7. Fold the wires into the switch box and use your screwdriver to install the dimmer and cover plate.
Turn on the power and enjoy the flexibility of your lighting!